
前言
但由于自建frp服务器成本过高,本站已为广大群晖爱好者免费提供frp服务器.本文将详解如何使用本站免费frp服务来为群晖NAS安装配置frp客户端实现内网穿透.
服务端frps
本站提供免费frp服务给广大群晖爱好者作为技术测试使用,请遵守国内相关法律法规.拒绝政治,色情相关非法信息传播使用.frp 信息的更新请访问和收藏专题站点 https://freefrp.net
客户端frpc
群晖NAS上安装客户端frpc有以下两种种方法:
- 群晖NAS docker 安装
[支持 docker 的群晖机型首选]
- 群晖NAS 一键脚本安装
[不支持 docker 的群晖机型]
群晖NAS docker 安装
群晖NAS 一键脚本安装
博主根据手动安装 frpc 的方式简单制作了针对
群晖NAS专用
的一键安装卸载脚本.脚本具体信息请参考我的Github仓库:
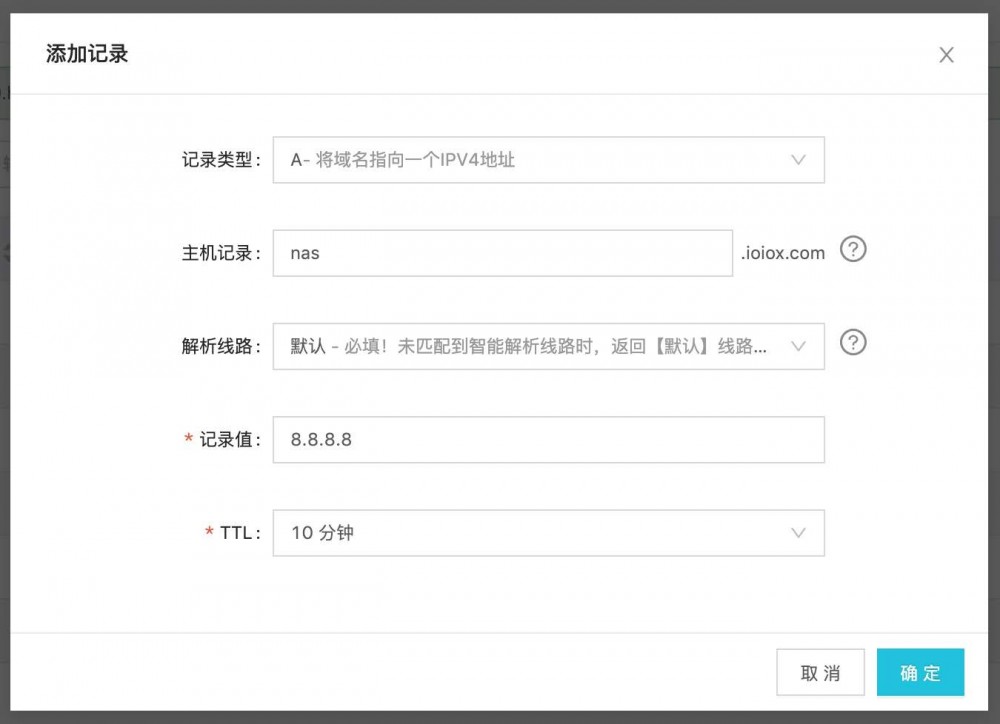
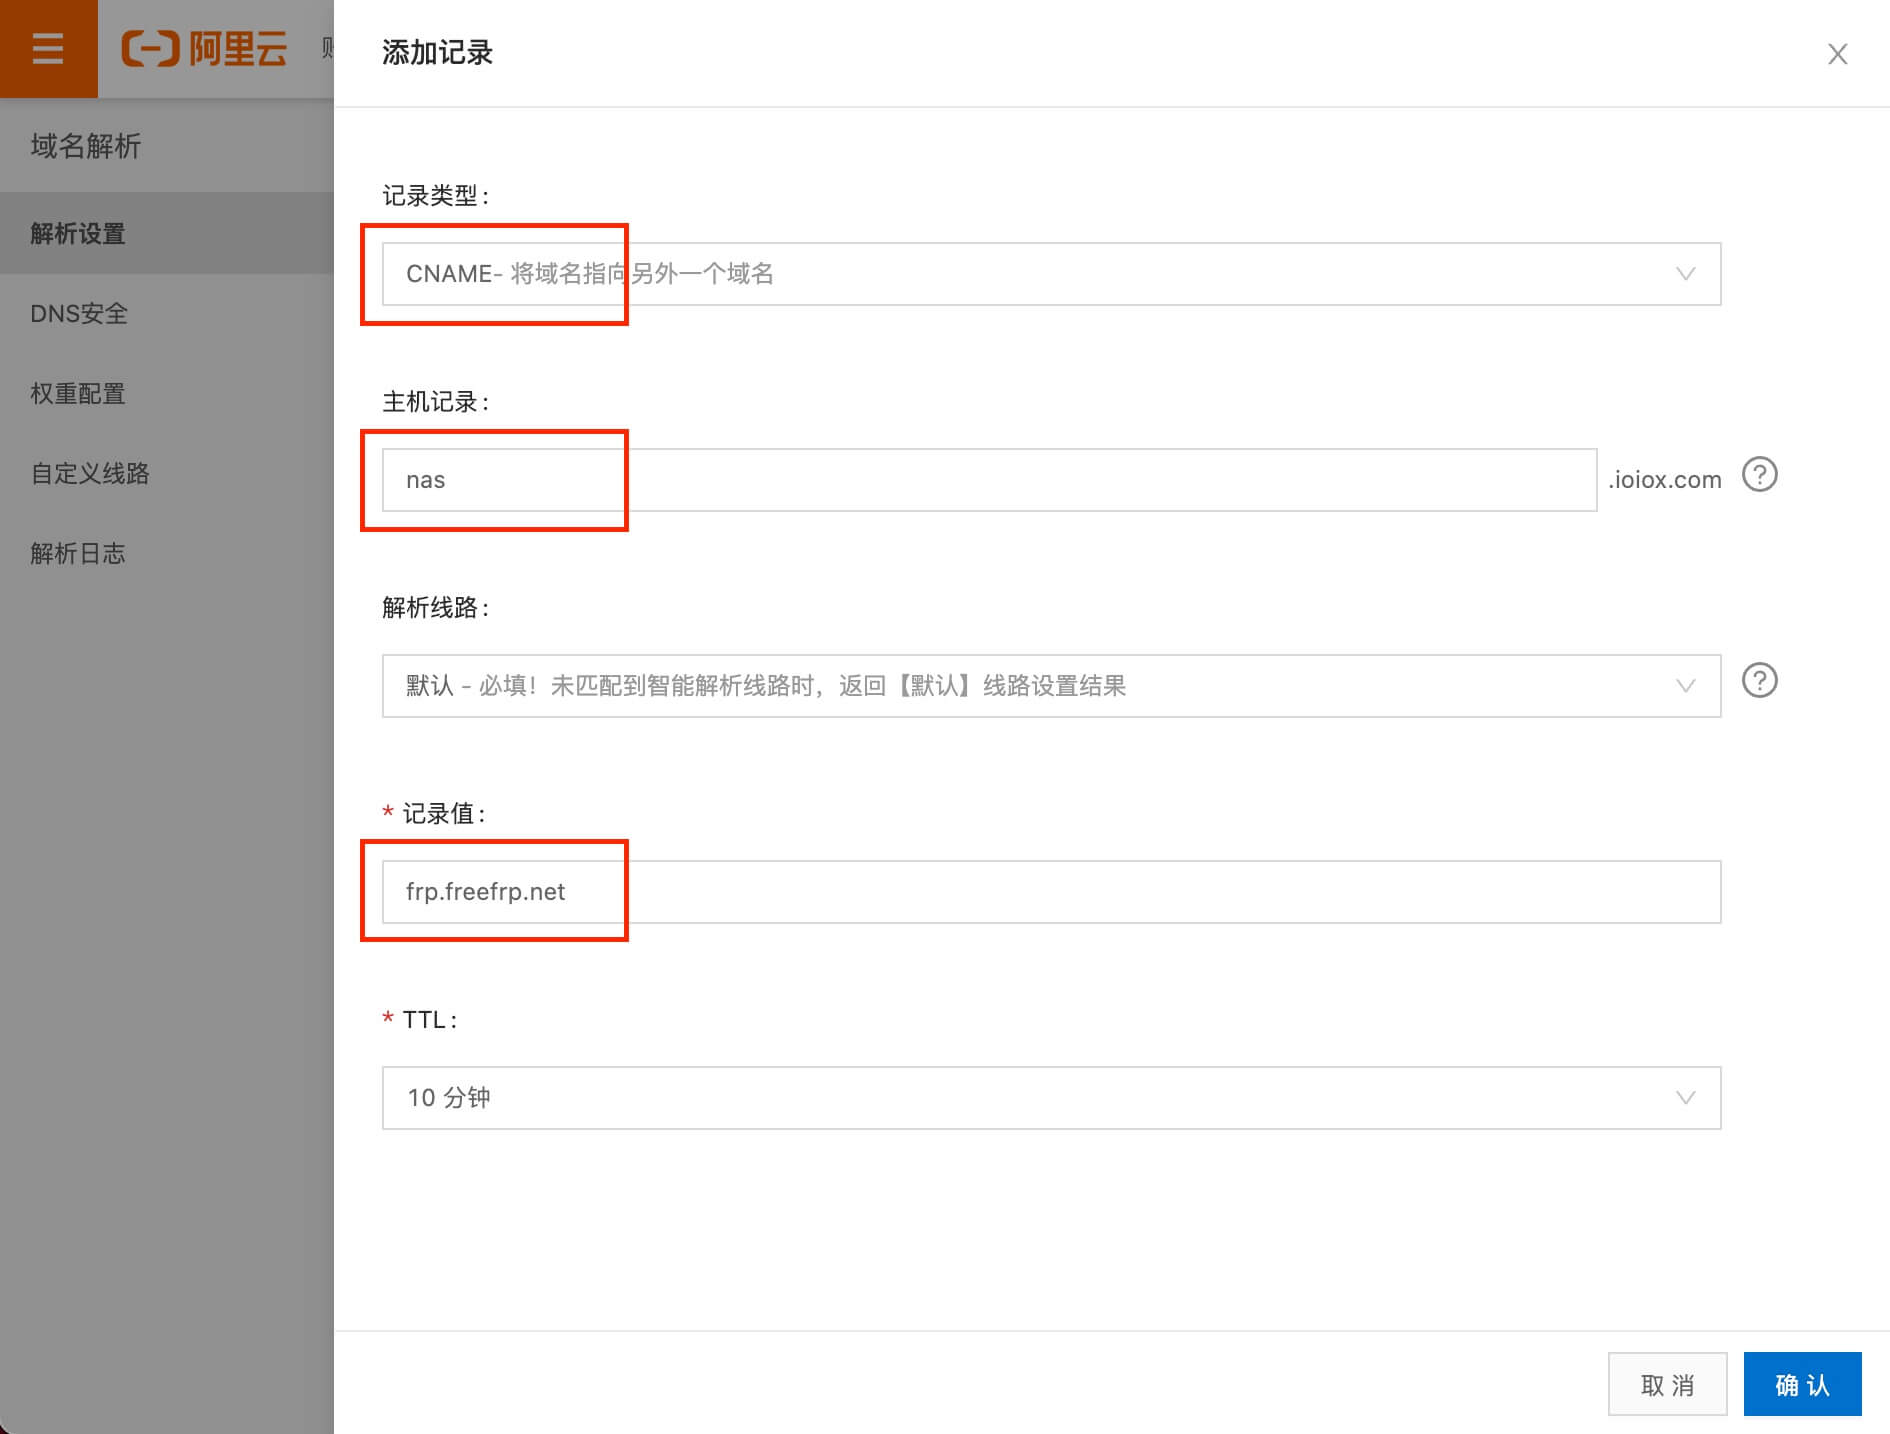
设置域名解析
登录你的域名服务商
域名解析
设置域名CNAME到frp服务器地址
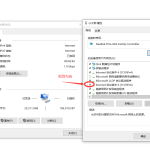
开启群晖SSH功能并登陆
控制面板-终端机和SNMP
启动SSH功能-应用
打开终端并ssh登陆到群晖
ssh xxxx@192.168.x.x # xxx为群晖管理员账号,IP为群晖内网IP.输入群晖登陆密码 - 回车. sudo -i # 获得root权限.输入群晖登陆密码 - 回车.一键安装卸载脚本
安装
wget https://raw.githubusercontent.com/stilleshan/frpc/master/frpc_synology_install.sh && chmod +x frpc_synology_install.sh && ./frpc_synology_install.sh # 以下为国内镜像 wget https://github.ioiox.com/stilleshan/frpc/raw/branch/master/frpc_synology_install.sh && chmod +x frpc_synology_install.sh && ./frpc_synology_install.sh卸载
wget https://raw.githubusercontent.com/stilleshan/frpc/master/frpc_synology_uninstall.sh && chmod +x frpc_synology_uninstall.sh && ./frpc_synology_uninstall.sh # 以下为国内镜像 wget https://github.ioiox.com/stilleshan/frpc/raw/branch/master/frpc_synology_uninstall.sh && chmod +x frpc_synology_uninstall.sh && ./frpc_synology_uninstall.sh如现有服务器上已存在 frpc 服务,可以先运行卸载脚本,在运行安装脚本.安装完成后编辑
frpc.ini配置你的穿透信息.
vi /usr/local/frp/frpc.ini修改参照
[common] server_addr = frp.freefrp.net # 服务器IP或者地址 server_port = 7000 # 服务器提供的端口号 token = freefrp.net # 服务器提供的token [web1_xxxxxx] # 为避免错误,一定需更改为比较特殊的名称,不能和服务器端其他配置重名. type = http # http协议 local_ip = 192.168.1.5 # 填写群晖内网IP. local_port = 5000 # 群晖内网HTTP端口,默认为5000. custom_domains = nas.ioiox.com # 填写你的域名 [web2_xxxxxx] # 为避免错误,一定需更改为比较特殊的名称,不能和服务器端其他配置重名. type = https # https协议 local_ip = 192.168.1.5 # 填写群晖内网IP. local_port = 5001 # 群晖内网HTTPS端口,默认为5001. custom_domains = nas.ioiox.com # 填写你的域名ESC退出编辑
输入:wq回车即可保存注意 frpc.ini 中不需要以上参照的注释符号和注释,即#和#之后的文字.更多 frpc.ini 的详解,请参考:新手入门 – 详解 frp 内网穿透 frpc.ini 配置启动frpc
确保
frpc.ini正确无误后执行以下命令后台启动服务.
nohup /usr/local/frp/frpc -c /usr/local/frp/frpc.ini >/dev/null 2>&1 &
服务运行时修改frpc.ini配置后需重启
frpc服务才能生效.执行以下命令查询
frpc运行进程,并使用
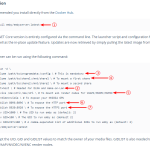
kill -9命令停止服务.如图查询
frpc的进程ID为
1108ps -aux|grep frp| grep -v grep # 查询 frpc 的运行进程ID,并 kill 停止服务. kill -9 1108
如因误操作等原因出现多个进程,可能会导致 frpc 无法使用正确的 frpc.ini 配置,需全部停止,再次启动即可.设置群晖NAS开机启动frpc
控制面板
任务计划
新增
触发的任务
用户自定义脚本
常规
填写任务名称
用户账号和事件保持默认
任务设置
用户自定义脚本
填写你的 frpc 后台启动命令
确定nohup /usr/local/frp/frpc -c /usr/local/frp/frpc.ini >/dev/null 2>&1 &
勾选新增的脚本
保存配置完成
现在可以使用域名无端口访问群晖NAS了
通过设置应用程序门户后,还可以使用域名无端口访问 Drive 和 Moments 等各种套件.例如:
http://www.你的域名.com/drive
http://www.你的域名.com/moments
http://www.你的域名.com/file
结语
关于frpc客户端的安装方法总结以下几种方式:
群晖 docker 安装 – 群晖NAS使用Docker安装配置frpc内网穿透教程
内网 Linux 服务器或虚拟机 一键脚本安装 – 参考我的GitHub项目 stilleshan/frpc
内网 Linux 服务器 docker 安装 – 参考我的GitHub项目 stilleshan/frpc更多群晖NAS相关技巧,教程及信息,请持续关注本站群晖Synology专栏:
本站提供免费和付费的技术支持.你可以通过留言,邮件,TG群的方式来技术交流和免费咨询.同时也可以付费支持的方式获得相关的技术支持,项目部署配置等服务.具体相关详情请点击查看 技术支持页面