wordpress功能集成(四)改变评论框样式
更新:2017-07-17
之所以将这篇教程放前面,是因为前面两节教程刚讲了过滤器和钩子,所以这篇文章就作为wordpress过滤器的一个实例来看,这篇教程的用途:修改评论表单样式,删除评论表单前面或后面的多余内容,给评论表单添加内容。前面wordpress主题制作基础教程之制作评论模板我们添加表单使用了wordpress提供的一个函数comment_form();该函数位于wp-includes/comment-template.php文件,函数介绍:
- <?php
- comment_form( $args, $post_id );
- //参数$args是一个数组,用来配置表单的一些显示内容
- //$post_id为评论表单对应的文章ID,默认为当前文章ID。
- ?>
一、修改表单配置
对于数组参数$args到底有哪些呢?我们看到comment_form函数的源码中,在定义一个数组$defaults的后面有一行代码
- $args = wp_parse_args( $args, apply_filters( ‘comment_form_defaults’, $defaults ) );
这行代码是函数中第一次出现参数$args的地方,也就是将传入的数组参数跟数组$defaults比较替换,将$args中的元素去替换$defaults中对应键的元素,所以只要是$defaults中出现了的元素,$args就可以有:
- $defaults = (
- ‘fields’ => apply_filters( ‘comment_form_default_fields’, $fields ),
- ‘comment_field’ => ‘<p =“comment-form-comment”><label =“comment”>’ . _x( ‘Comment’, ‘noun’ ) . ‘</label><textarea id=“comment” name=“comment” cols=“45” rows=“8” aria-required=“true”></textarea></p>’,
- ‘must_log_in’ => ‘<p =“must-log-in”>’ . sprintf( __( ‘You must be <a href=“%s”>logged in</a> to post a comment.’ ), wp_login_url( apply_filters( ‘the_permalink’, get_permalink( $post_id ) ) ) ) . ‘</p>’,
- ‘logged_in_as’ => ‘<p =“logged-in-as”>’ . sprintf( __( ‘Logged in <a href=“%1$s”>%2$s</a>. <a href=“%3$s” title=“Log out of this account”>Log out?</a>’ ), admin_url( ‘profile.php’ ), $user_identity, wp_logout_url( apply_filters( ‘the_permalink’, get_permalink( $post_id ) ) ) ) . ‘</p>’,
- ‘comment_notes_before’ => ‘<p =“comment-notes”>’ . __( ‘Your email address will not be published.’ ) . ( $req ? $required_text : ” ) . ‘</p>’,
- ‘comment_notes_after’ => ‘<p =“form-allowed-tags”>’ . sprintf( __( ‘You may these <abbr title=“HyperText Markup Language”>HTML</abbr> tags attributes: %s’ ), ‘ <code>’ . allowed_tags() . ‘</code>’ ) . ‘</p>’,
- ‘id_form’ => ‘commentform’,
- ‘id_submit’ => ‘submit’,
- ‘title_reply’ => __( ‘Leave a Reply’ ),
- ‘title_reply_to’ => __( ‘Leave a Reply to %s’ ),
- ‘cancel_reply_link’ => __( ‘Cancel reply’ ),
- ‘label_submit’ => __( ‘Post Comment’ ),
- );
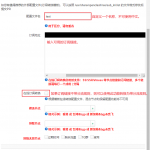
本工作室的评论表单配置如下,就改变了几个很简单的元素:
- $defaults = (
- ‘comment_field’ => ‘<p =“comment-form-comment”><textarea id=“comment” name=“comment” cols=“45” rows=“8” aria-required=“true”></textarea></p>’,
- ‘comment_notes_before’ => ”,
- ‘label_submit’ => __( ‘提交评论’ ),
- ‘comment_notes_after’ =>”
- );
- comment_form($defaults);
我将comment_field-也就是评论内容输入的文本域前面的“评论”字样删掉了,然后comment_notes_before为空-也就是那个提醒“您的邮箱地址不会被公开”,然后comment_notes_after也为空-就是评论表单后面那个提示你可以使用哪些标签。
如果你想修改对应的某些项,找到你的主题的comment_form函数(一般来说在comments.php文件),然后看他的参数,自行修改。。。
二、过滤器应用
不过到这里好像跟我说的过滤器实例还没扯上啊,我们看到comment_form在$defaults数组的前面还有一个数组
- $fields = (
- ‘author’ => ‘<p =“comment-form-author”>’ . ‘<label =“author”>’ . __( ‘Name’ ) . ‘</label> ‘ . ( $req ? ‘<span =“required”>*</span>’ : ” ) .
- ‘<input id=“author” name=“author” type=“text” value=“‘ . esc_attr( $commenter[‘comment_author’] ) . ‘” size=“30”‘ . $aria_req . ‘ /></p>’,
- ’email’ => ‘<p =“comment-form-email”><label =“email”>’ . __( ‘Email’ ) . ‘</label> ‘ . ( $req ? ‘<span =“required”>*</span>’ : ” ) .
- ‘<input id=“email” name=“email” type=“text” value=“‘ . esc_attr( $commenter[‘comment_author_email’] ) . ‘” size=“30”‘ . $aria_req . ‘ /></p>’,
- ‘url’ => ‘<p =“comment-form-url”><label =“url”>’ . __( ‘Website’ ) . ‘</label>’ .
- ‘<input id=“url” name=“url” type=“text” value=“‘ . esc_attr( $commenter[‘comment_author_url’] ) . ‘” size=“30” /></p>’,
- );
这个数组就是评论表单前面的三个评论者信息输入文本框,我想也有很多人需要修改这个东西,额,实际上这个$fields数组也在$defaults数组中了,$defaults数组的第一个元素就是,不过我们还是要转个弯、多走一步路,以便讲解过滤器的使用。$defaults的第一个元素是:
- ‘fields’ => apply_filters( ‘comment_form_default_fields’, $fields ),
这里提供了一个过滤器comment_form_default_fields,修改的参数就是$fields;要修改这个参数,只需要添加一个过滤器,比如:
2017-07-17更新:特别注意,很多新入门朋友会犯的错误,即先从comment_form函数源码中复制代码,然后用过滤器,在这个过滤器中,请先将复制出来的变量删除,比如源码中的:
- //复制的author中含有 __()函数,$req $commenter变量等
- ‘author’ => ‘<p =“comment-form-author”>’ . ‘<label =“author”>’ . __( ‘Name’ ) . ‘</label> ‘ . ( $req ? ‘<span =“required”>*</span>’ : ” ) . ‘<input id=“author” name=“author” type=“text” value=“‘ . esc_attr( $commenter[‘comment_author’] ) . ‘” size=“30”‘ . $aria_req . ‘ /></p>’,
正确的做法是像下面代码中,不含变量。
- add_filter(‘comment_form_default_fields’,’ashuwp_custom_comments_fields’);
- ashuwp_custom_comments_fields( $fields ){
- $fields = (
- ‘author’ => ‘<p =“comment-form-field comment-form-author”><label =“author”>称呼*</label><span =“required”>*</span><input id=“author” name=“author” type=“text” value=“” /></p>’,
- ’email’ => ‘<p =“comment-form-field comment-form-email”><label =“email”>Email*</label><span =“required”>*</span><input id=“email” name=“email” type=“text” value=“” /></p>’,
- ‘url’ => ‘<p =“comment-form-field comment-form-url”><label =“url”>网址</label><input id=“url” name=“url” type=“text” value=“” /></p>’,
- );
- $fields;
- }
注意:过滤器函数必须要有返回值。。。
尽情的查找apply_filters函数,然后尽情的修改吧。。


